
Last week around this time I promised I’d be helping my fellow writers now deeply entrenched in NaNoWriMo by showing them how a little program called Scrivener can make things a bit more organized and smooth for them. I for one am the kind of person who feels the best way to get to know a piece of software is to roll up my sleeves and use the damn thing. Fortunately, even the beta for Windows comes with a tutorial built into it. What I like about this tutorial is, as you work your way through it, you’re learning more about the software just by reading about what it does. It’s extremely intuitive.
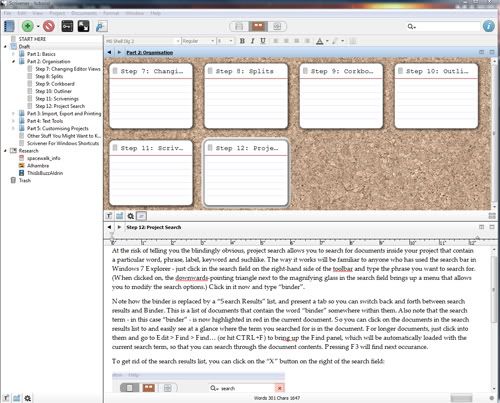
So this is what Scrivener can look like. Feeling a little lost? Here’s a short version on what you might be looking at.
The Binder
The biggest thing Scrivener offers a writer is a means of organizing, sorting and arranging bits of information and research all in one place. It’s like having all the tools you need in one box instead of scattered all over your apartment and your parents’ basement. Not that I’d know anything about that.
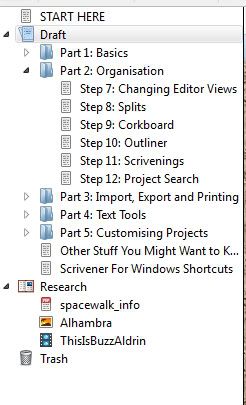
The most obvious place to see this is the left-hand column called the Binder. This is where you will find pretty much every document you work on in a given project. You can navigate through them one click at a time, rather than hunting and searching through folders, flash drives and hand-written notes. When you start a new Scrivener project, you have folders for your draft, any research you want to include and trash.
The neat thing about the trash bin in the Binder is that it doesn’t destroy your work automatically. Unless you specifically empty the trash bin, the work is always there for you to reference, restore or copy-paste into a more viable document. The Binder allows you to break what may be a work with hundreds of thousands of words into smaller, more managable chunks that you can edit, reorganize and publish much more easily. I’ll deal with all those things in upcoming posts.
The Inspector
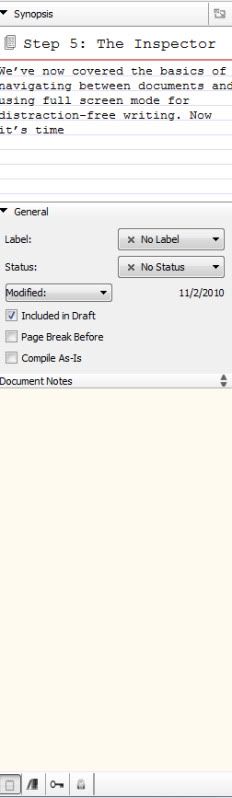
While the Binder lets you physically organize your work, the Inspector provides organizational help from a data perspective. It first and foremost lets you specify a synopsis that will show up in Scrivener’s Corkboard and Outline views. I’ll get to that in a moment.
The Inspector’s additional powers deal with making searching for aspects of your work easier. Say you want to look for scenes from a particular character’s point of view, or focused on a given subject. With the Inspector, you can add labels, notes and keywords that make these searches more comprehensive and easier to understand, rather than drilling through the entire document one search result at a time. You also have the option to add notes to the entire project through the Inspector.
Last but not least, the Inspector lets you specify how a given document will appear in the final product, if it appears at all. You can exclude a passage from your final draft without losing its content, specify when page breaks should happen or set a document’s status as finished, in progress or “a mess.” The status of the document, like its labels, are totally customizable. Making Scrivener your own is about as intuitive as it gets.
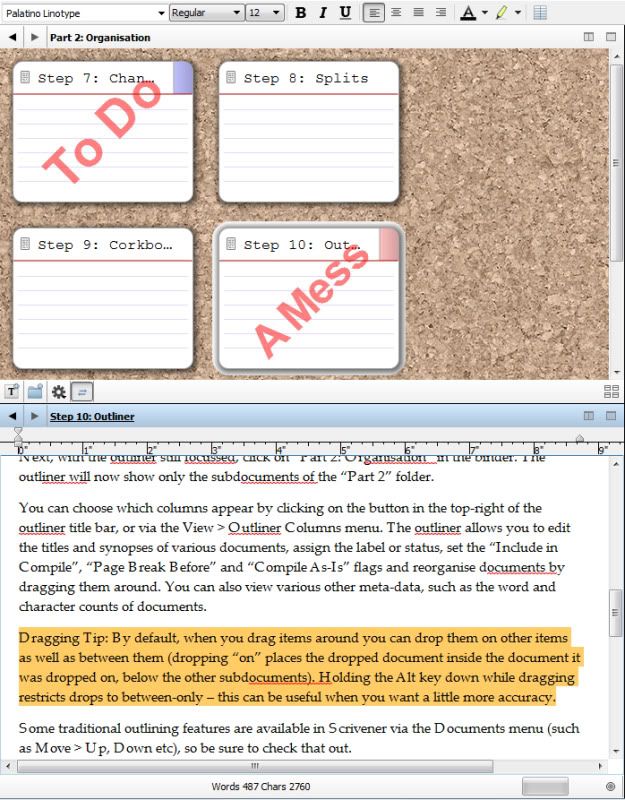
The Corkboard
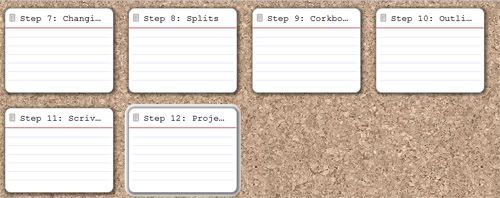
This is a matter of personal preference. Scrivener has two views that lets you see what’s in your documents as you shift them around, how they’re labelled and what their status is. None of this info shows up in the Binder. At least it doesn’t in the beta I was working with. Anyway, these views are the Corkboard and the Outliner.
The Outliner lays out the sections and sub-sections of a project in a very linear fashion. Not only do you see status and labels, but you also see when a document was created as well as when it was modified. It’s chock full of information and very handy, but I, being somewhat more of a visual person, perfer the Corkboard.
Maybe it’s the idea of pinning things down to get them where I want them. Maybe it’s the act of moving the cards around to get the right order. Maybe it’s the way labels show up as big red stamps that makes me smile. Whichever view you choose, I hope you’ll find organizing information in a draft as easy as I have. You can even use the Corkboard to navigate if you like. An option in the view allows you to control the document displayed in the portion of the editor not displaying the view you prefer.
“Portion?” I hear you asking. “What do you mean by ‘portion’?”
I’m glad you asked.
Split Views & Scrivenings
Scrivener allows you to split the view in the main window. You can, in essence, have two documents open in the same window at the same time. If you felt you may have repeated yourself unnecessarily, this is a good way to check. Moreover, having the Corkboard or Outliner open in one part of the window while you edit in the other makes it very easy to keep track of where you are even if you have the Binder closed. You can move documents around and get right into editing them afterwards, to make sure your work flows properly from one snippet to the next.
The other direction is the Scrivenings. This overall view lets you view multiple documents as a single, cohesive text. You can also edit it as you view it, which may make you feel like you’re back in Word save for the fact that switching back to one of Scrivener’s other modes takes just a click or two. It’s important to see how the end result may look from time to time, and Scrivenings is a good way to do that without having to make the program spit out a sample “finished draft.”
So that’s how Scrivener looks. But how does it actually work, and how would an author like myself work with it? Join me next week when I take my last coherent draft of Citizen In The Wilds and give it the Scrivener treatment.